How to use Docker to run ASP.NET Core apps on Google App Engine
Ivan Naranjo
C# Team Lead
Ever wish you could run an ASP.NET Core app on Google App Engine? Now you can, by packaging it in a Docker container.
Google App Engine is a platform for building scalable web applications and mobile backends, and provides the built-in services and APIs common to most applications. Up until recently this infrastructure was only accessible from a handful of languages (Java, Python, Go and PHP), but that changed with the introduction of App Engine Flexible Environment, previously known as Managed VMs. App Engine Flexible allows you to use a Docker container of your choice as the backend for your app. And since it's possible to wrap an ASP.NET Core app in a Docker image, this allows us to run ASP.NET Core apps on App Engine Flexible.
Step 1: Run your ASP.NET Core app locally
There have been NuGet packages for Google Cloud APIs in .NET for a long time, but starting with version 1.15.0.560, these NuGet packages have started targeting the .NET Core runtime. This allows you to write ASP.NET Core apps that use the Google Cloud APIs, to take advantage of services like Google Cloud Storage, Google Cloud Pub/Sub, or perhaps the newer machine learning APIs.To show you how to deploy an ASP.NET Core app to App Engine Flexible, we’re going to deploy a very simple app (see the documentation for information about how to build an ASP.NET app that uses the GCP APIs). Of course to use ASP.NET Core, you'll first need to install the .NET Core runtime and Visual Studio tooling, as well as Bower, which our ASP.NET Core app project uses to set up client-side dependencies.
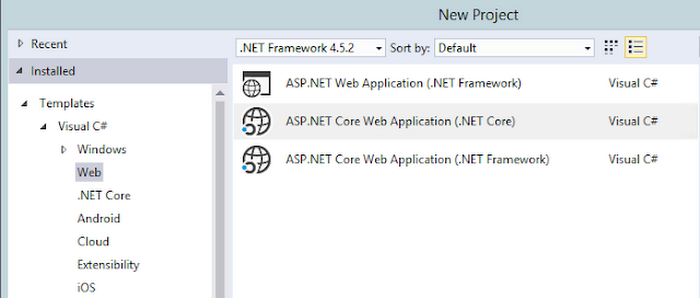
Let’s start by creating a new ASP.NET Core app from Visual Studio. Open up Visual Studio and select “File > New Project…”. In the dialog, select the “Web” category and the “ASP.NET Core Web Application (.NET Core)” template:
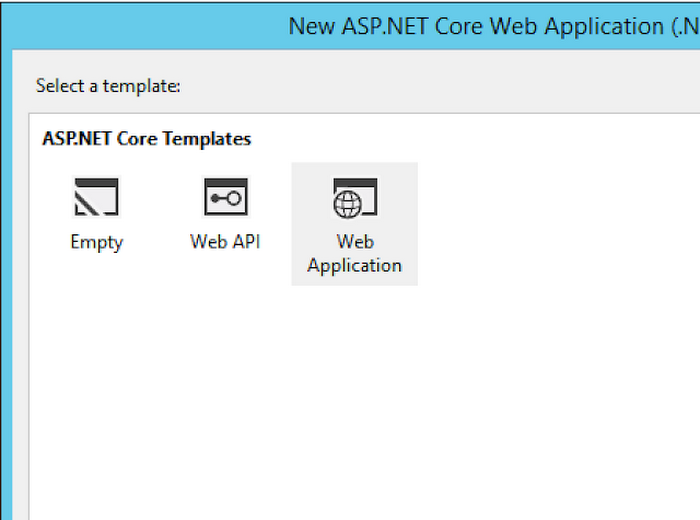
Name the app “DemoFlexApp” and save it in the default “Projects” directory for Visual Studio. In the next dialog, select “Web Application” and press “OK”:
This will generate the app for you. Try it locally by pressing F5, which will build and run the app and open it in a browser window. Once you're done, stop the app by closing the browser and stopping the debugging session.
Step 2: Package it as a Docker container
Now let’s prepare our app to run on App Engine Flexible. The first step is to define the container and its contents. Don’t worry, you won’t need to install Docker ⸺App Engine Flexible can build Docker images remotely as part of the deployment process.
For this section, we'll work from the command line. Open up a new command line window by using Win+R and typing cmd.exe in the dialog.
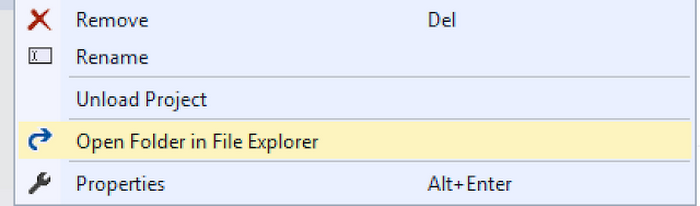
Now we need to navigate to the directory that contains the project you just created. You can get the path to the project by right clicking on the project in Visual Studio’s Solution Explorer and using the “Open Folder in File Explorer” option:
You can then copy the path from the File Explorer window and paste it into the command line window.
We'll start by creating the contents of the Docker image for our app, including all its packages, pages, and client side scripts in a single directory. The dotnet CLI creates this directory by “publishing” your app to it, with the following command:
Your app is now published to the default publish directory in the Release configuration. During the process of publishing your app, the dotnet CLI resolves all of dependencies and gathers them together with all other files into the output directory. This directory is what Microsoft calls a .NET Core Portable App; it contains all of the files that compose your app, and can be used to run your app on any platform that NET Core supports. You can run your app from this directory with this command:
Be sure to be in the published directory when you run this command so that all of the resources can be found.
The next step is to configure the app that we'll deploy to App Engine Flexible. This requires two pieces:
- The Dockerfile that describes how to package the app files into a Docker container
- The app.yaml file that tells the Google Cloud SDK tools how to deploy the app
We will deploy the app from the “published” directory that you created above.
Take the following lines and copy them to a new file called “Dockerfile” under the “published” directory:
A Dockerfile describes the content of the Docker image starting from an existing image and adds files and other changes to it. Our repo Dockerfile starts from the Microsoft official image, which is already configured to run .NET Core apps and adds the app files and the tools necessary to run the app from the directory.
One important configuration included in our Dockerfile is the port on which the app listens for incoming traffic ⸺
port 8080, per App Engine Flexible requirements. This is accomplished by setting the ASPNETCORE_URLS environment variable, which ASP.NET Core apps use to determine the port to listen to.
The app.yaml file describes how to deploy the app to App Engine, in this case, the App Engine Flexible environment. Here's the minimum configuration file required to run on App Engine Flexible, specifying a custom runtime and the Flexible environment. Copy its contents and paste them into a new file called “app.yaml” under the “published” directory:
Step 3: Deploy to App Engine Flexible
Once you’ve saved the Dockerfile and app.yaml files to the published directory, you're ready to deploy your app to App Engine Flexible. We’re going to use the Google Cloud SDK to do this. Follow these steps to get the SDK fully set up on your box. You'll also need a Google Cloud Platform project with billing enabled.Once you've fully configured the app and selected a project to deploy it to, you can finally deploy to App Engine Flexible. To do that run this command:
The command will take some time to complete, especially the first time since it has to perform all the setup. Once done, open a browser to the newly deployed app:
There! You’ve downloaded an ASP.NET Core app, packaged it as a Docker container, and deployed it to Google App Engine Flexible. We look forward to seeing more ASP.NET apps running on Google App Engine.